
Baby Christmas Dress
I was thinking about making a baby Christmas dress for Granddaughter Lilly and wondering about fabric when this appeared at … Read more
I was thinking about making a baby Christmas dress for Granddaughter Lilly and wondering about fabric when this appeared at … Read more
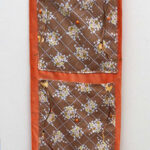
I did say I was going to do some tutorials on the “Home made Christmas Gifts” page and a wall … Read more
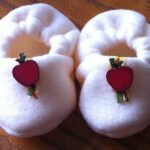
As promised I’m going to show you how to make plush baby booties like these, and the ones in an … Read more