Tutorials

Handmade Bookmarks

FacebooktwitterredditpinterestFacebooktwitterredditpinterest


In our busy lives it’s always handmade bookmarks 
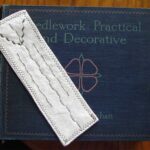
nice to find time to sit and read a good book. It’s also nice to have some lovely handmade bookmarks to hand, I hate to see a book getting the corner of it’s page turned over!


These are really simple to make in about 30 mns, depending on whether you hand or machine stitch.

If you’ve read my other posts you might recognise the fabric and trim in this bookmark, remember my tip about not throwing small pieces of fabric away?


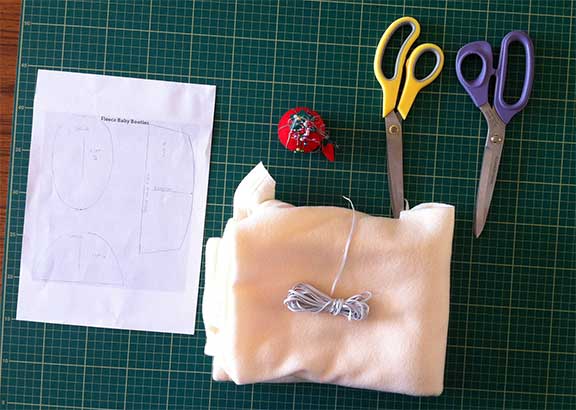
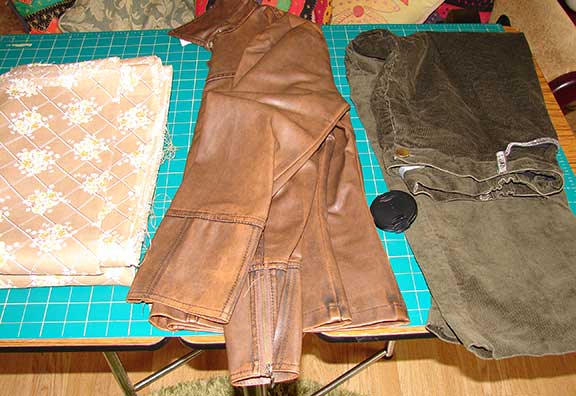
So, gather your materials
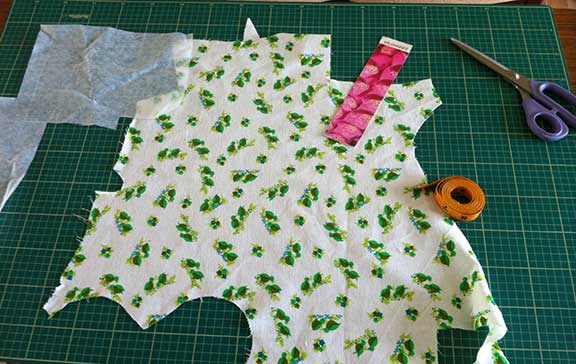
 Materialstogether,

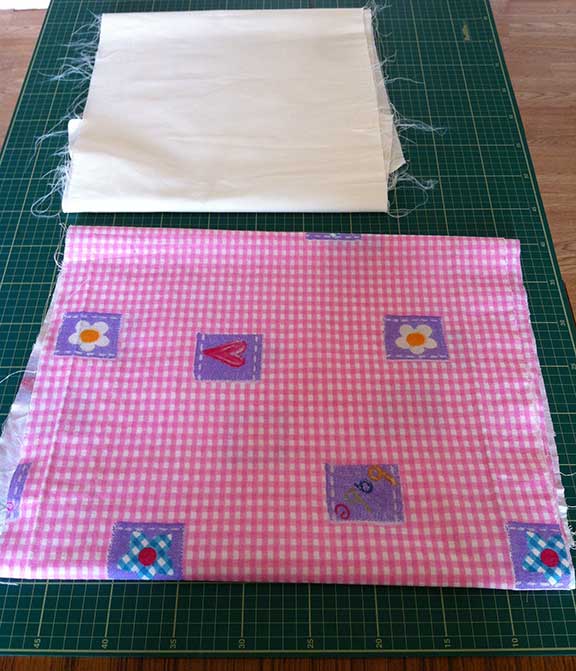
  • Fabric, most fabrics can be made into bookmarks.
  • Iron on interfacing (if you’re using a very stiff fabric you won’t need this)
  • Trim


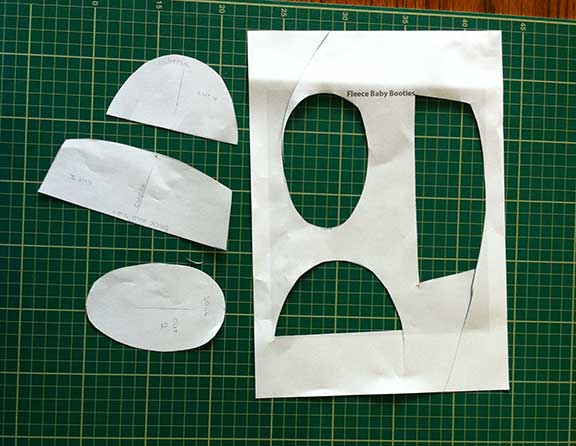
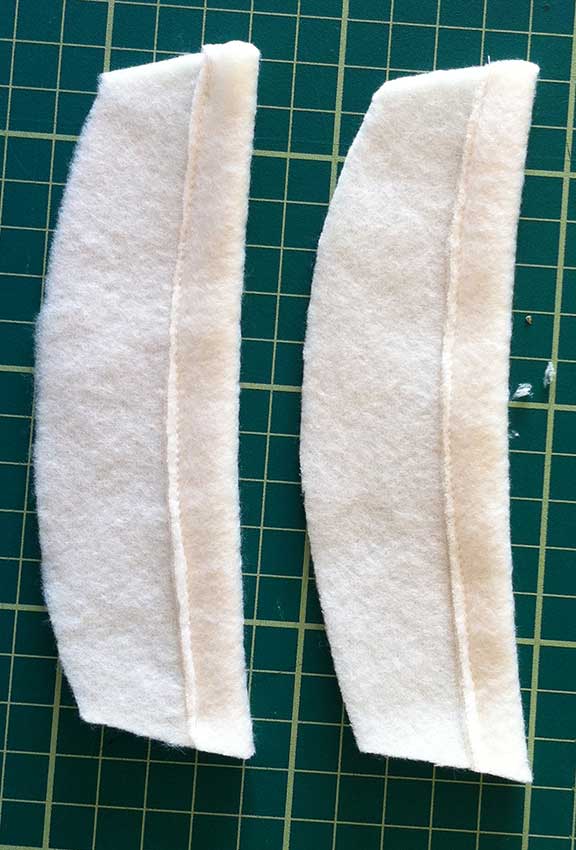
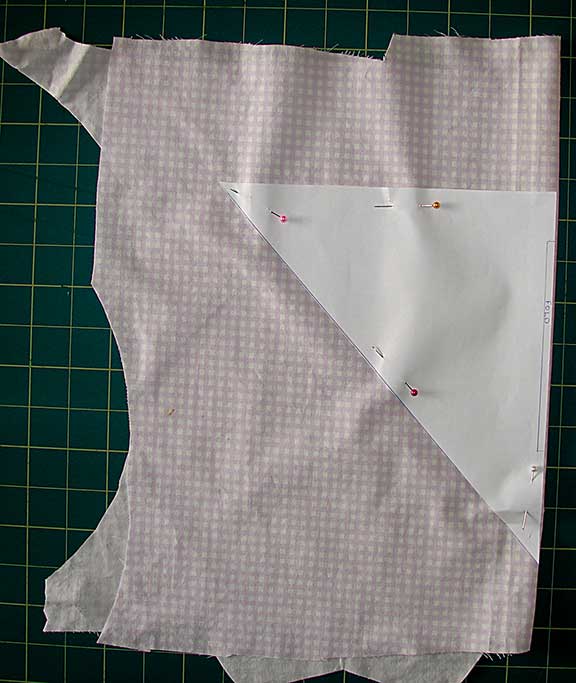
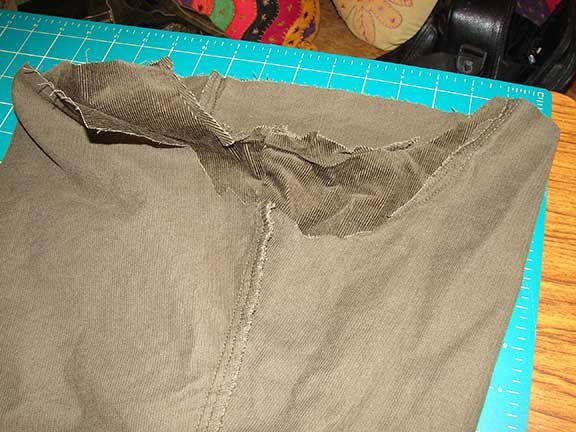
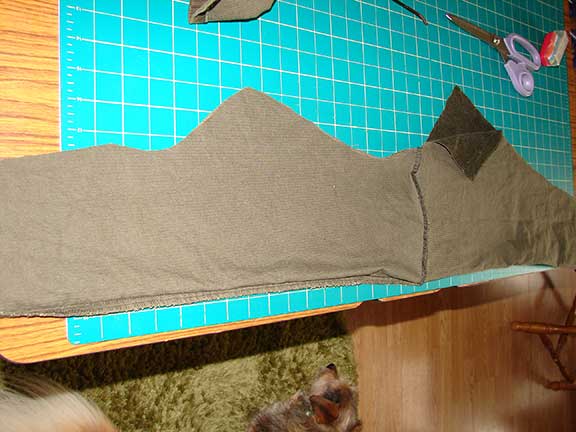
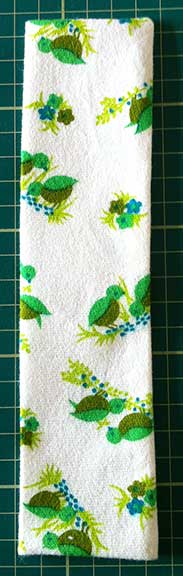
Cut a piece of fabric Pieces cut out
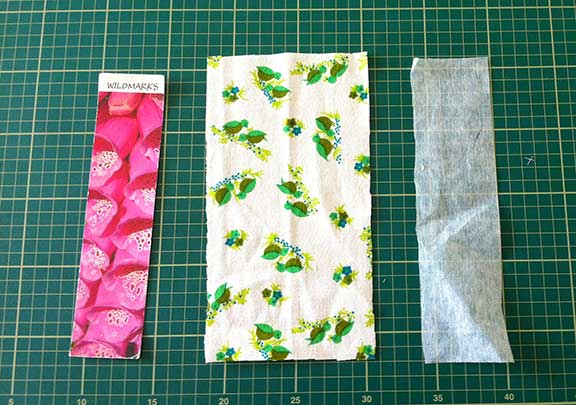
12cm x 23cm (I used an existing bookmark to measure). Cut a piece of interfacing 6cm x 23cm.


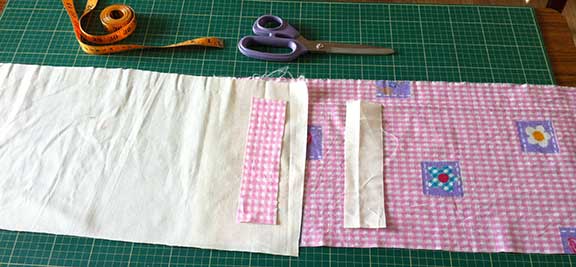
Iron the interfacing onto oneSewn up and tseams trimmed with pinking shearsInterface ironed on to fabric 
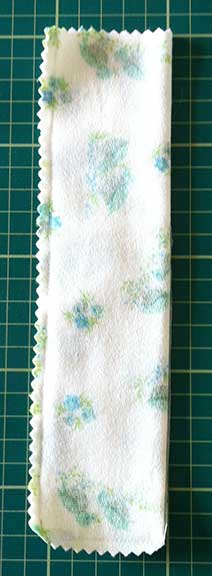
half on the wrong side of fabric.


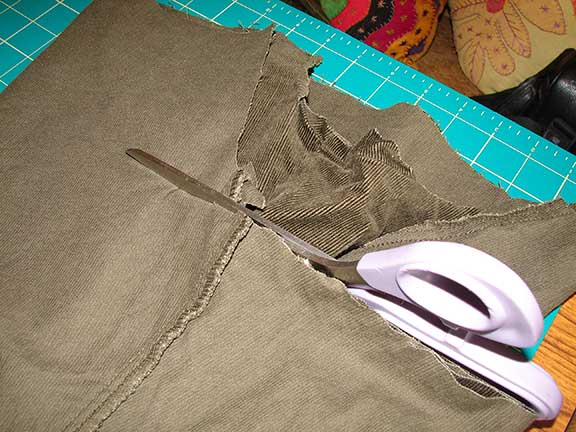
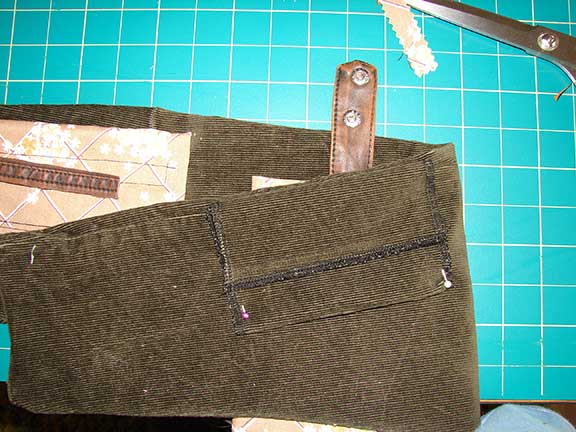
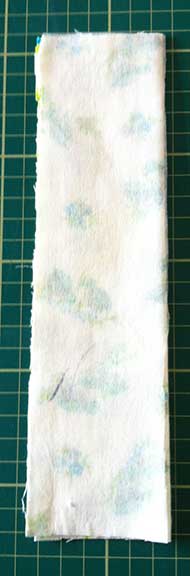
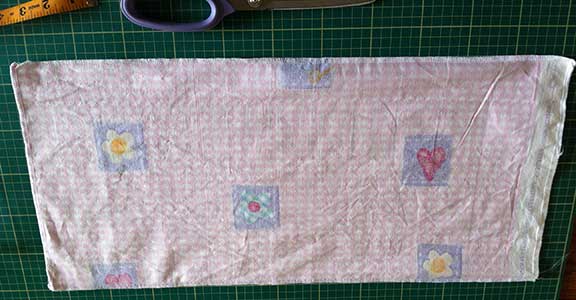
Keep right sides together sitch the long side and one short side together. Trim the seams.


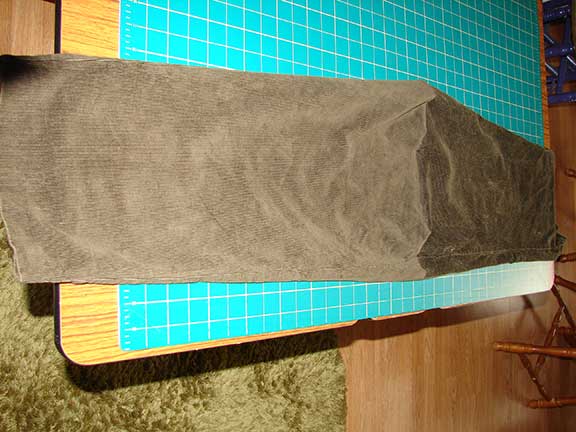
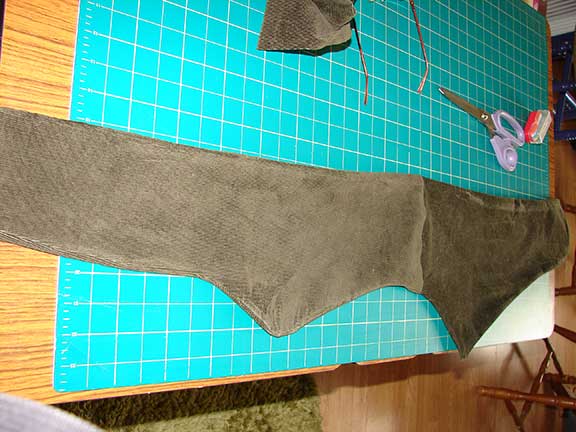
Turn right sides out and press Book mark top stitchedSewn piece turned right side out
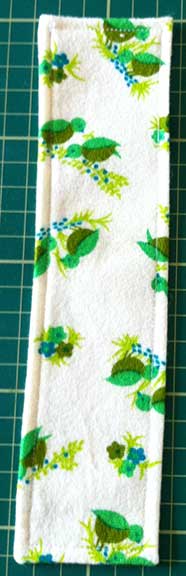
turning the open end in.

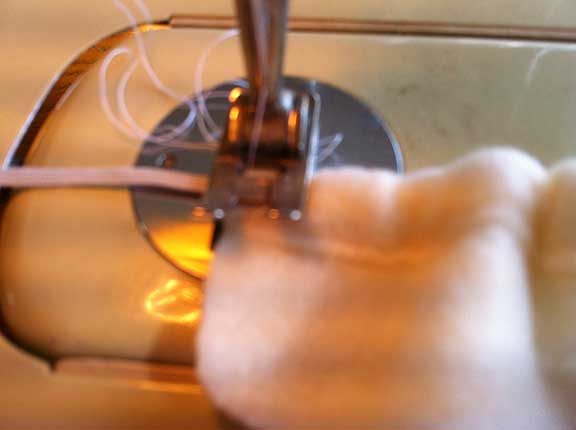
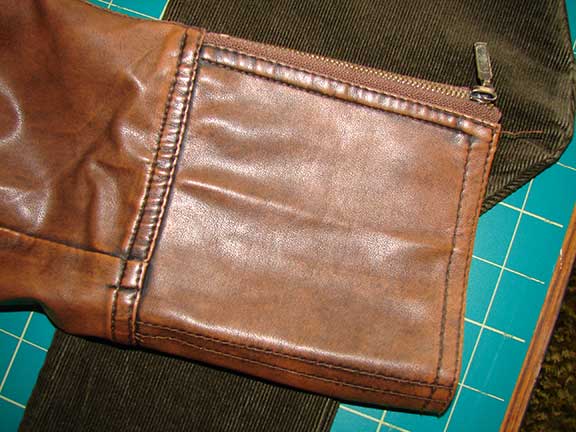
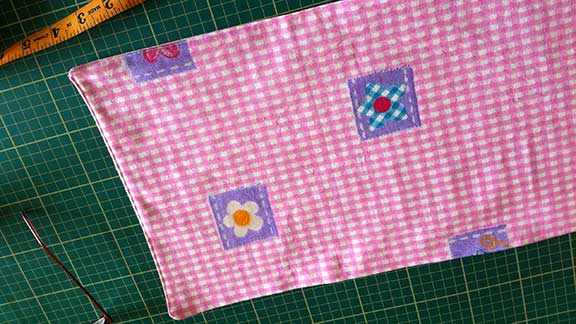
This is another place where you can use my favourite Top stitch technique. Top stitch round all four sides making sure you catch the open end.


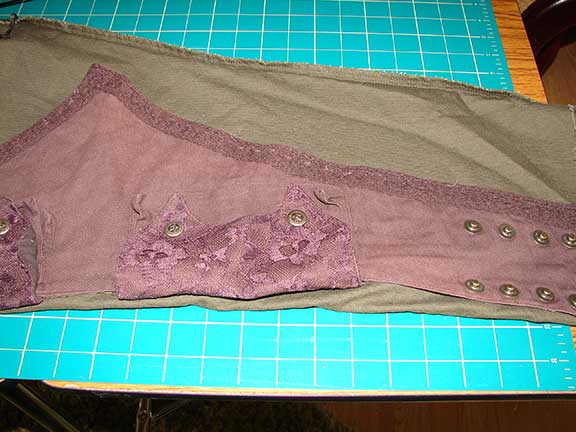
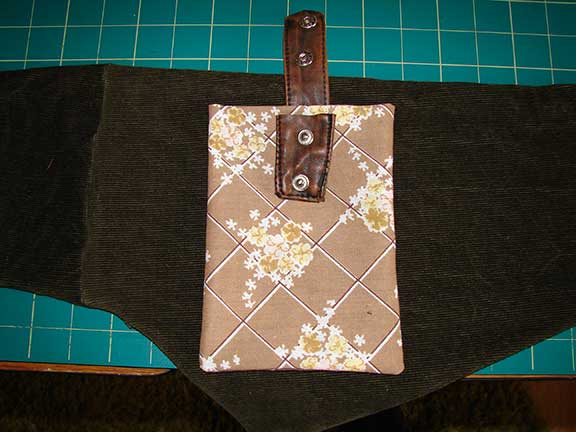
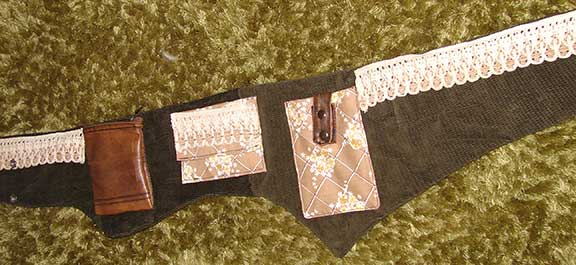
All that’s left now is to add your trim/decoration. There are lots of things you can use:

  • Fabric paint, paint your own designs
  • Buttons
  • Lace
  • Ribbon
  • The decorative stitches on sewing machine if you have one

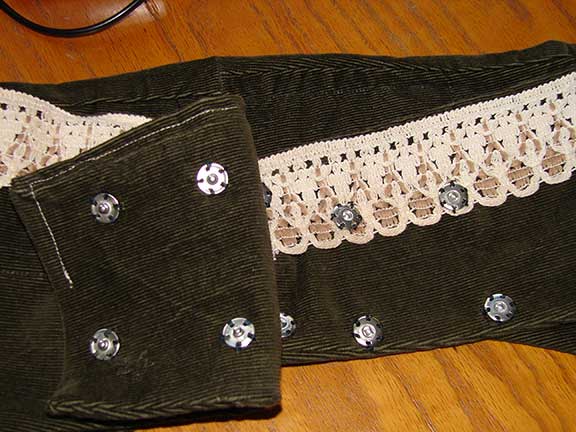
I used gift wrap ribbon for mine, Gift ribbon
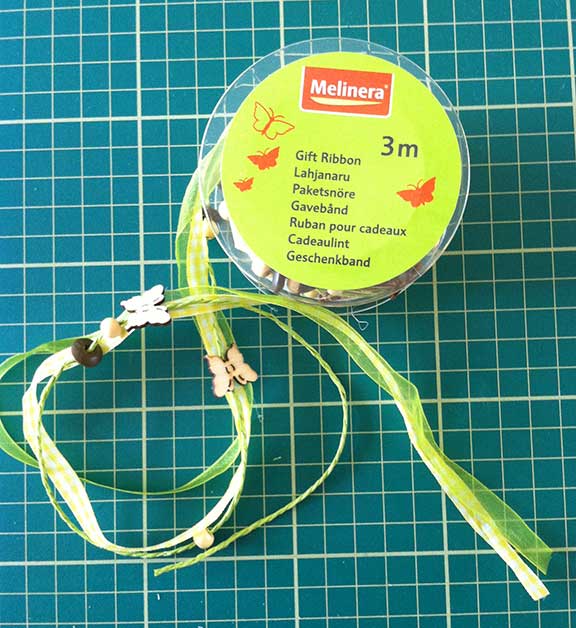
it was on special at Lidls (discount store), it was in the bargain bin for 49p. I’ve already used it in a few projects!


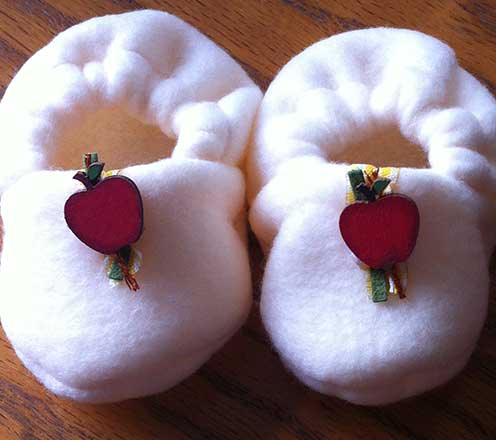
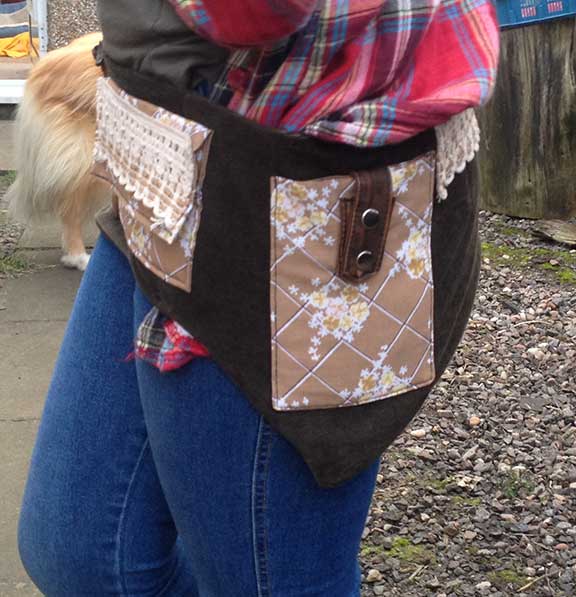
One completed bookmark. I would normally make a batch of these they’re so quick and easy but did a single for this tutorial. They make great wee gifts and stocking fillers!Completed bookmark with gift ribbon sewn on as embellishment8

FacebooktwitterredditpinterestFacebooktwitterredditpinterest

Diaper Bag from Old Curtains

FacebooktwitterredditpinterestFacebooktwitterredditpinterest

After searching for some fabric suitable Completed diaper bagfor my latest project I located a curtain pelmet which I’d stripped down into fabric and lining. So now for my latest project, a diaper bag from old curtains using a tutorial I found at Karen’s blog here.


TIPDon’t throw away small pieces of fabric, even small pieces can be used for decoration.


I started with my curtain pelmet material Materialsusing the lining for the inside and cut a piece out of each plus the straps, following the instructions on the tutorial.


Pieces cut out


At this point I noticed my white thread was getting low so had a look round for special offers. With thoughts of Christmas gifts starting to appear it might be prudent to make sure you have all you need, there’s nothing worse than starting a project and not having the right colour thread etc. I decided to stock up on threads and sundrys when I found this special offer Save 10% + Free P&P with offer code CRAFT10. Valid on orders of £20 or more at Stitch Craft Create

BARGAIN!


After the excitment of buying some nice bits and pieces it was back to the diaper bag.

My overlocker came in handy for the next Sewn seamsbit as the lining was fraying everywhere! Pinking shears will also work for this (check here for help on buying scissors). You can also do a zig zag stitch close to the edge.


Following the instructions, I turned it Turn right side outright side out but didn’t manage to get the corners as neat as I’d liked. I’m going to practise this technique, neat square corners look so much better.


 Strap sewn onNext it was the strap, straight forward following the instructions.


I didn’t have nappies/diapers and wipes to test Upcycled Diaper bag completefor size so guessed based on the tutorial image.


Then finally a fastener for the strap, I used velcro as it’s what I had in my sewing box.

And that’s it, it took me around 1hr 30mns to do including the photos, and it would make a nice gift filled with some nappies, wipes and cream. I’m going to be making more of these, a great way to use up smaller pieces of fabric.

Complete with diapers and wet wipes open Complete with diapers and wet wipes closed shut

FacebooktwitterredditpinterestFacebooktwitterredditpinterest

Onesie Dress Tutorial

FacebooktwitterredditpinterestFacebooktwitterredditpinterest


Babies spend a onesie dress tutorial
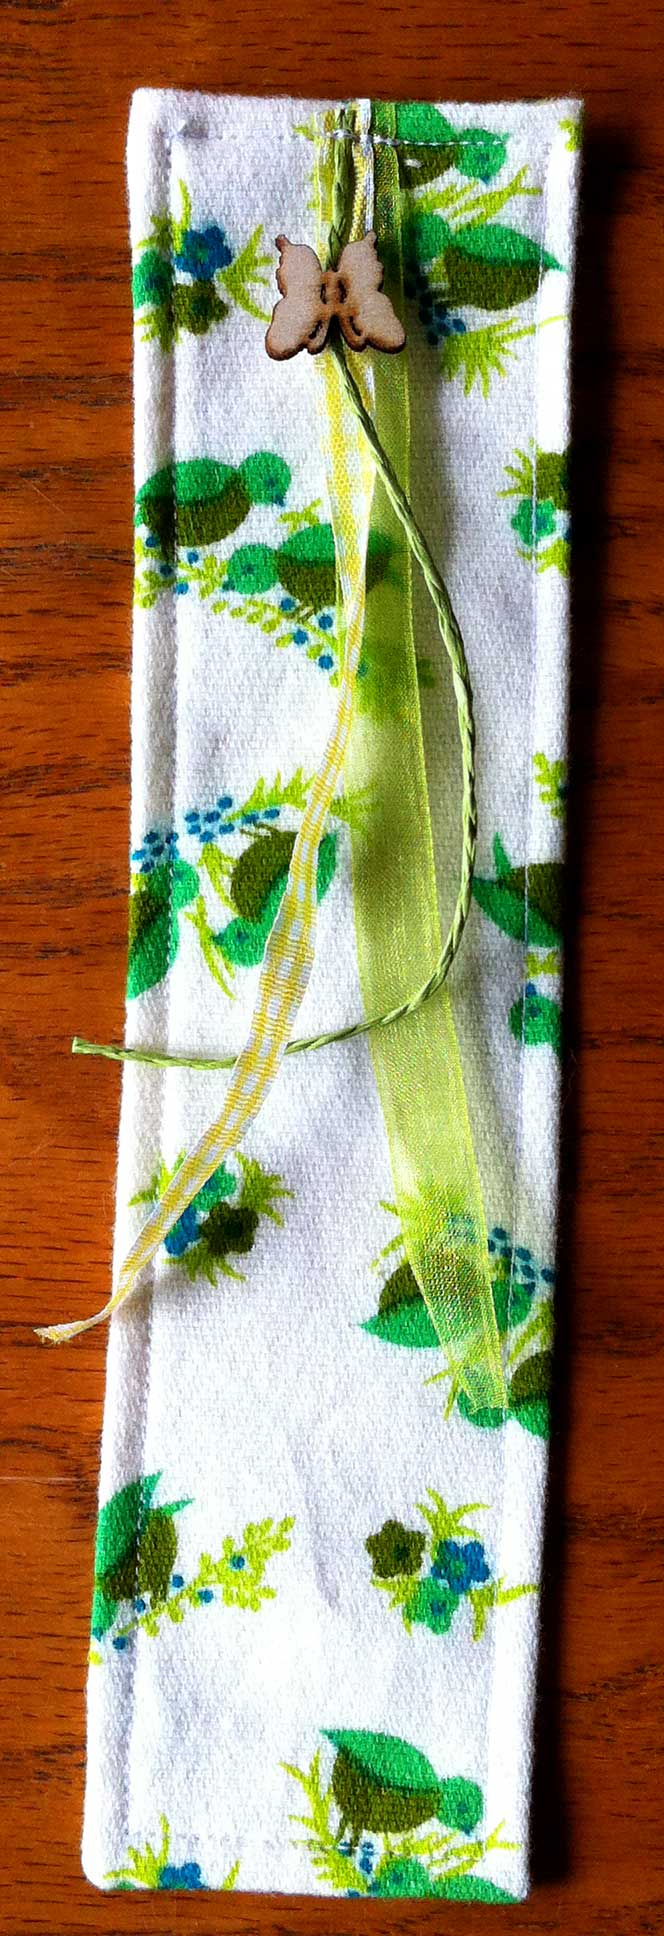
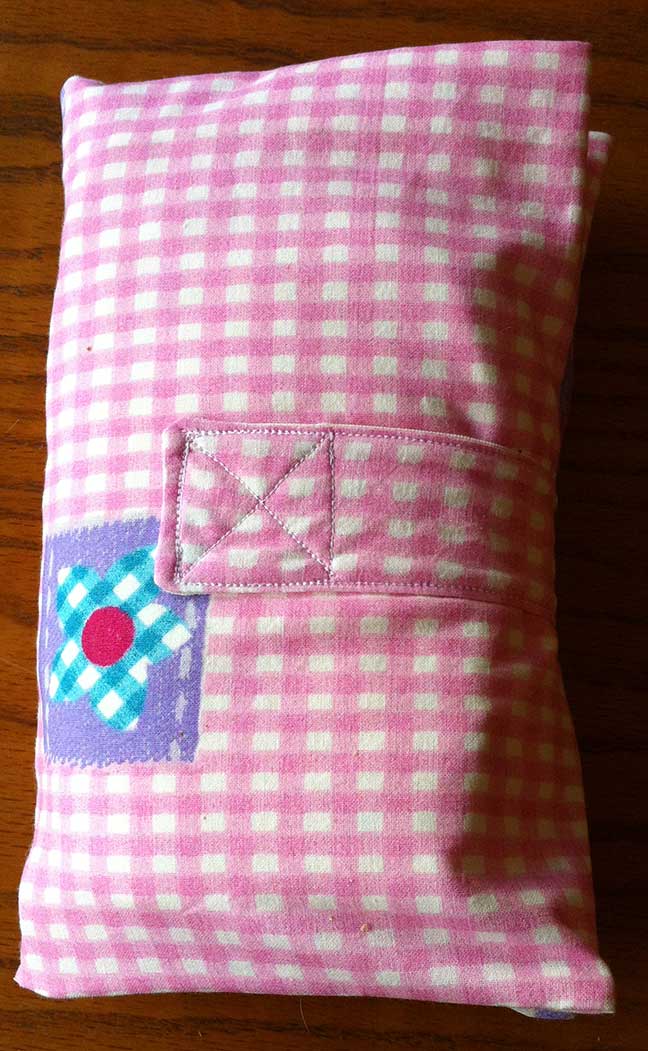
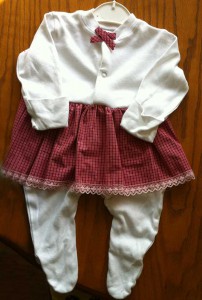
lot of time in sleepsuit/onesies, they’re easy to get on and off a wriggly squirming baby! The thing is, when you have a new baby girl you want to dress her in girly things so I’ve found a solution, this onesie dress tutorial from Emma’s blog

Now I’ve done my own take on this, I live in Scotland and we’re coming into the cold weather so I used a sleepsuit (see right). I also upcycled an old shirt so had to fiddle around a bit to get enough fabric.


I took the back of the shirt and Materialscut 2 strips, overlocked around the edges the joined the 2 sides.


TIPPress your fabrics before you start.


Long-Tube overlocked


From there I followed the Gathered tuble to make skirtinstructions on the blog, doing the gathers was fiddly but keep measuring against the sleepsuit till it fits.


I had some trim in my stash so edged the hem with it to pretty it up, then I made a wee bow for the kneck and VOILA, a pretty but cosy dress for your baby girl!

Complete onsie dress

FacebooktwitterredditpinterestFacebooktwitterredditpinterest

How to make Plush Baby Booties

FacebooktwitterredditpinterestFacebooktwitterredditpinterest

As promised I’m going Plush baby booties
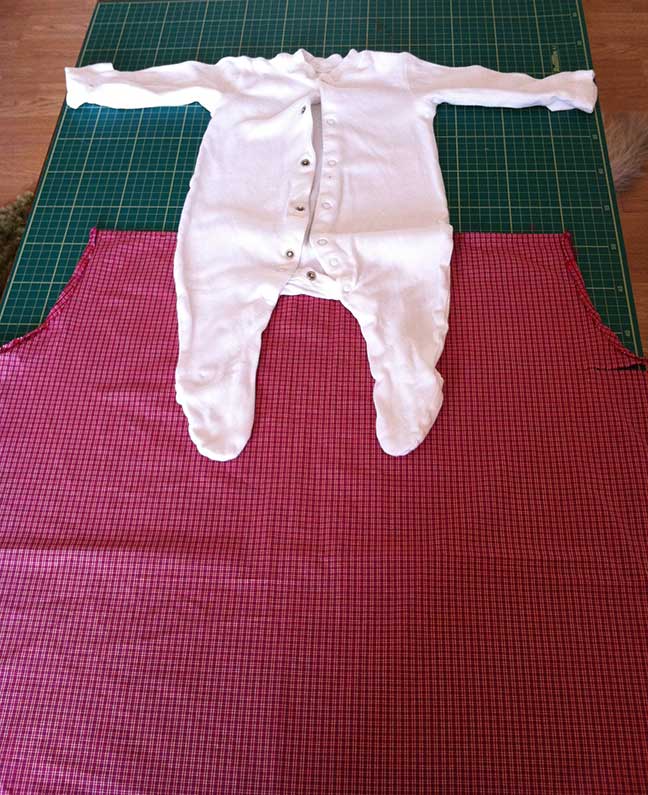
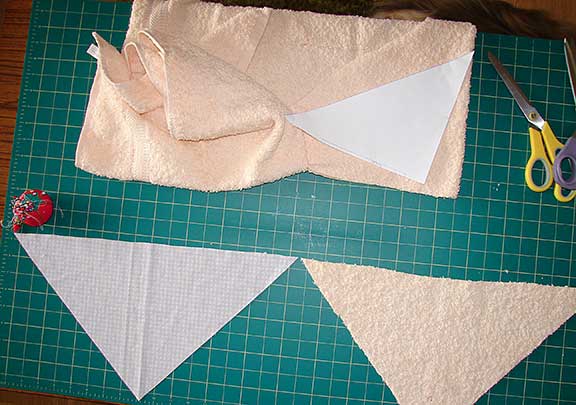
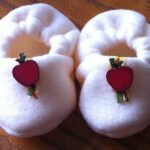
to show you how to make plush baby booties like these, and the ones in an earlier blog post Here’s one I made earlier.” I used fleece but you can use any fabric or trim. These are small enough that it wouldn’t take long to sew them by hand if you don’t have a machine.


First download the pattern here  Upcycled-Baby-Booties

The pattern is for 3mths but I’ll explain how to make them smaller later in the tutorial.


Next gather your materials: Materials

  • Fabric (fleece and cotton work well)
  • Elastic (1/4″)
  • Pattern


Cut out the pattern pieces from the paper. Paper pattern pieces


Fold the fleece (it doesn’t matter which way) Paper pattern pinned to fabricand pin the pattern pieces to it.


Then cut out the pieces remembering to cut 4 for Pattern pieces cut outthe upper.


Take the 2 “back and side” pieces and stitch a hem alongHem stitched for elastic the straight edge wide enough for the elastic.


Thread the elastic through the hem using a Elastic being threaded through hemdarning needle with a large eye.


Hold onto both elastic ends and pull to Pulling elastic ends together to form top openinggather.


To secure the elastic in place stitch backSewing elastic in place and forward over it.


Tidy up the ends and you’ll be left withFirst 2 pieces complete 2 pieces like this.


Now, this is the bit that’s tricky to explain Sandwich upper pieces with elasticated bitshence the extra pics! Take 2 of the uppers and sandwich the elasticated pieces between along the straight edge.


12


14


Stitch along the straight edge.Stitch along stright line


Tidy the seams.Tidy up seams


Flip the back/side over and mark the centre.Mark the centre


mark the centre 2


Line up the centre of the soles to the centrePin soles to uppers of the uppers, pin and stitch.

This is where you can make them smaller by sewing the seam further in.


Stitch and trim seams


Tidy up the seams.Tidy seams


Turn right side out.Right side out


All that’s left is to add the trim, you can use anything here, just make sure it’s well secured on the bootie!

One pair of finished plush baby booties!

Finished plush baby booties with trimPlease contact me if there’s anything about this tutorial you need help with.

FacebooktwitterredditpinterestFacebooktwitterredditpinterest

Upcycled Bandana Bib

FacebooktwitterredditpinterestFacebooktwitterredditpinterest

Bandana Bibs are simple to make and great for making use of fabric scraps and towels. You can use left over fabric from a baby outfit to make a matching upcycled bandana bib. They’re also great for gifts, make a set of 3 with pretty fabric, a baby can never have enough bibs (you might recognise the fabric in this article!). Firstly make your pattern or you can use the one below. I used an existing bib, folded it in half,  laid it on an A4 sheet of paper, then drew and cut round it. You can do this for any style of bib. I’ll generally do a few at the same time as they don’t take long.

Download PDF File here bandana-bib

TIPCheck charity shops and car boot sales for towels or keep your ears open for friends who are changing their bathroom colour scheme and buying new towels!

Next gather your materials:

  • Pattern
  • Fabric of your choice, cotton works well for this.
  • Toweling or microfibre fleece.
  • Fastener, I use hook and loop/velcro but you can use press studs if you prefer

Materials

Fold your fabic in half and pin the pattern on, putting fold mark on pattern against fold in fabric.

paper pattern pinned on

Cut out and repeat for towelling, you’ll then have 2 pieces like this:

Cut out fabric

If you don’t have an overlocker, at this stage do a zig zag stitch round the towelling edge to stop fraying (not needed if you use micro fleece). Pin the pieces right sides together and overlock/sew together leaving a 4″ gap (for turning right side out).

Pin fabric pieces

Sew and overlock fabric pieces

Turn right side out and press turning the gap edges in.

Turned right side out and pressed

Top stitch all the way round making sure you catch the folded in edge.

The last thing is to sew on your fastening, I prefer hook and loop as it’s easy to whip on and off a fidgety baby!

Sew on hook and loop for fastening

And that’s it, simple! Here it is beside 2 others I made previously in a different size and style.

3 upcycled baby bibs different styels


FacebooktwitterredditpinterestFacebooktwitterredditpinterest

Festival/Utility Belt

FacebooktwitterredditpinterestFacebooktwitterredditpinterest

Ever seen a cool looking festival/utility belts, you easily make your own with an old pair of trousers and scraps of fabric. It can be used at festivals but staying on the theme of Upcycled Baby items you can keep your own bits and pieces in it when you’re trying to juggle baby and paraphanalia! I made this festival/utility belt up as I went along, but you can let your imagination run wild for pockets and trims.

MATERIALS

I started with a pair of cords, a fake leather jacket, (both off bargain rail in charity shop) and some vintage fabric given to me by my Mum..

Materials

Instructions

I wanted the belt to be adustable, size 10 to 14 (UK measurement) so I cut off the trouser legs (leg length was 30″), turned one leg inside out then put one leg inside the other right sides together.

1Leg Inside Other

Cut along the top to straighten, then pin and stitch.

CutToStraighten

Turn right side out and you’ll be left with a long tube.

LongTube after being sewn together

The next thing to do is shape the bottom edge, I used an existing festival belt for this,.Turn the tube inside out and draw the shape with tailor chalk then cut it out.

Cut Shape

CutShape2

Stitch along 2 long sides and 1 short side, if you don’t use an overlocked seam trim (use pinking shears if you have them). Turn right side out and give it a press.

Sewn and turned right sides out

This is the basic belt so now it’s time to think about pockets. The jacket already had zips in the cuffs so I utilised 1 cuff by cutting it off and sewing up the 2 sides leaving the zip in place.

Cuff Pocket

For the next pocket I used the vintage fabric. I wanted a mobile phone to fit in it so took measurements from that but doubled the fabric for extra strength. Remember to leave a bit of room to allow for the thickness of the phone.

MoBile Phone pocket measurement

Keeping the folded edge for the top of the pocket stitch 3 sides and trim seams. I used the neck fastener from the jacket for the fastener on this pocket, you can use your imagination here or Velco (hook and loop fastener) works well.

Phone-Pocket laid in place with fastener

This gives you some ideas for making pockets. Depending on what you want to carry you can make pockets to suit with any scraps you have. It’s also useful to make a discreet pocket on the inside for carrying money/credit cards. I used some of the trouser fabric that was left, overlocked the edges then folded the piece so there was a flap and stitched it to the back of the belt. A bit of Velcro under the flap to fasten so there’s nothing to rub against the skin works well.

Secret-Pocket


Position the pockets onto the belt then stitch them on. I had to hand sew the “cuff” pocket as the seam was too thick for the sewing machine. Sew on any fasteningsDepending on what you used or your taste a little bit of trimming can be added. I had some in my stash (picked up from a sale in Hobbycraft) which I thought was a good match.

trimming Finished

TIP: Keep your eye on the bargain bins in craft shops, there’s quite often end pieces of trimming from the large “by the metre” rolls

Finally it’s time to get the press studs on. To make it adustable use 6 and sew them on at an angle. It’s useful to have a model here to position the studs! I sitched mine on but you can use the snap fastener rivet type.

Stud fasteners sewn on

Finished

And that’s it, lots of scope to use your artisticness (is that a word?)! This is my grandaughter with the belt on (excuse the photobombing Rosie dog!).

Festival/handy belt on Eve

Festival/utility belt on Eve 2

Festival/Utility belt on Eve photo bombed by dog


FacebooktwitterredditpinterestFacebooktwitterredditpinterest